Getting Started
Branch's Quote to Bind GraphQL API exposes to developers everything they need to go from initial quote to final purchase with Branch's insurance product without having to leave your platform.
If you have any questions, please reach out to us at api@ourbranch.com and we'd be happy to help.
GraphQL
If you have not worked with GraphQL before, the official documentation is a great place to get started: https://graphql.org/learn/
You can also find GraphQL client libraries for most popular programming languages here: https://graphql.org/code/
Typical Flow
The typical order of operations in an end-to-end flow would be:
- Initial quote (
requestQuoteV2) - Modify the offer (
recalculateQuoteV2,addCar,addDriver) - Purchase (
requestBind)
How to Think About Offers
On Branch's platform, all offers are immutable.
- Once an offer is created with an ID, the offer at that particular ID will never be changed or modified.
- When you make a change (with
recalculateQuoteV2,addCar, oraddDriver), you will receive an entirely new offer with a different offer ID that includes the changes you wanted to make. - You will then want to continue your flow with this new offer / offer ID.
- All previous versions will remain available with their original offer IDs, accessible with the
getOfferquery.
Using the GraphQL Playground
- The GraphQL Playground is available on the top right of the navbar. You might want to open it in a new tab or window so you can use it while referring to these docs.
API Key Authorization
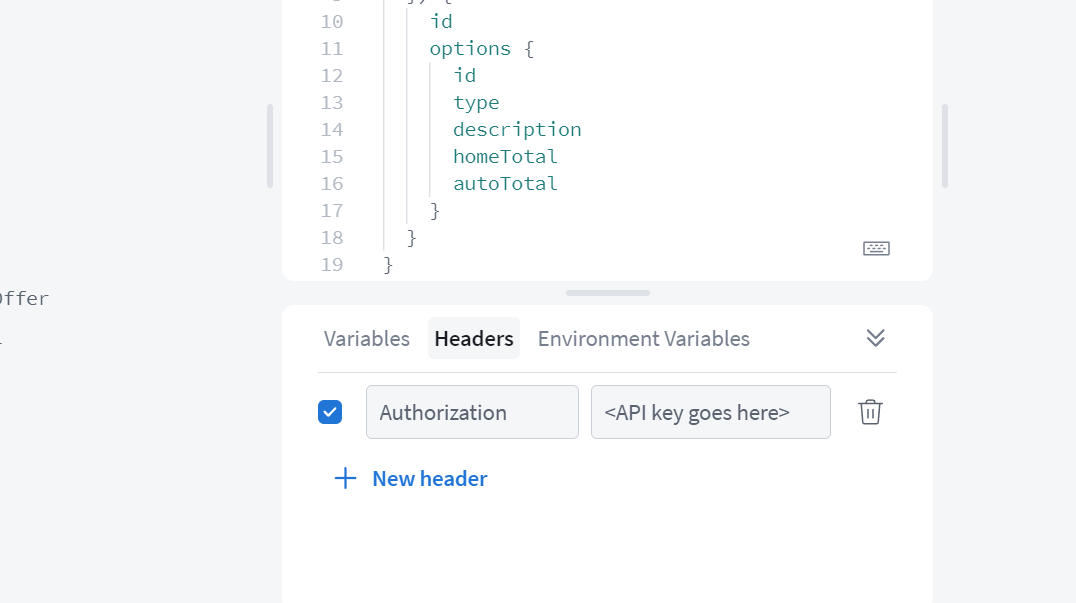
- In order to make requests, you will need to include your API key as part of your requests in the "Authorization" HTTP header. You can add it in the playground here:
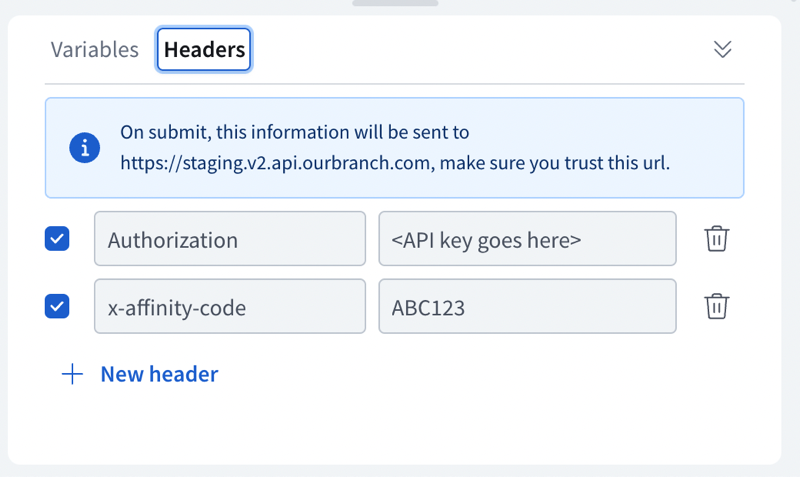
- If you're a partner responsible for multiple affinity codes, you must also include the affinity code you're making this request on behalf of in the
x-affinity-codeHTTP header. This applies primarily to partners responsible for several agencies, so if you're able to successfully make API calls with just the "Authorization" header you can safely ignore this.
Staging Endpoint, Test Users and Test Payment Methods
The staging endpoint that you can test with prior to releasing in production is https://staging.v2.api.ourbranch.com
For use with the playground and the staging API endpoint, we have a test data universe of names and addresses you can use. The complete set of test data is available here:
Navigating the Playground
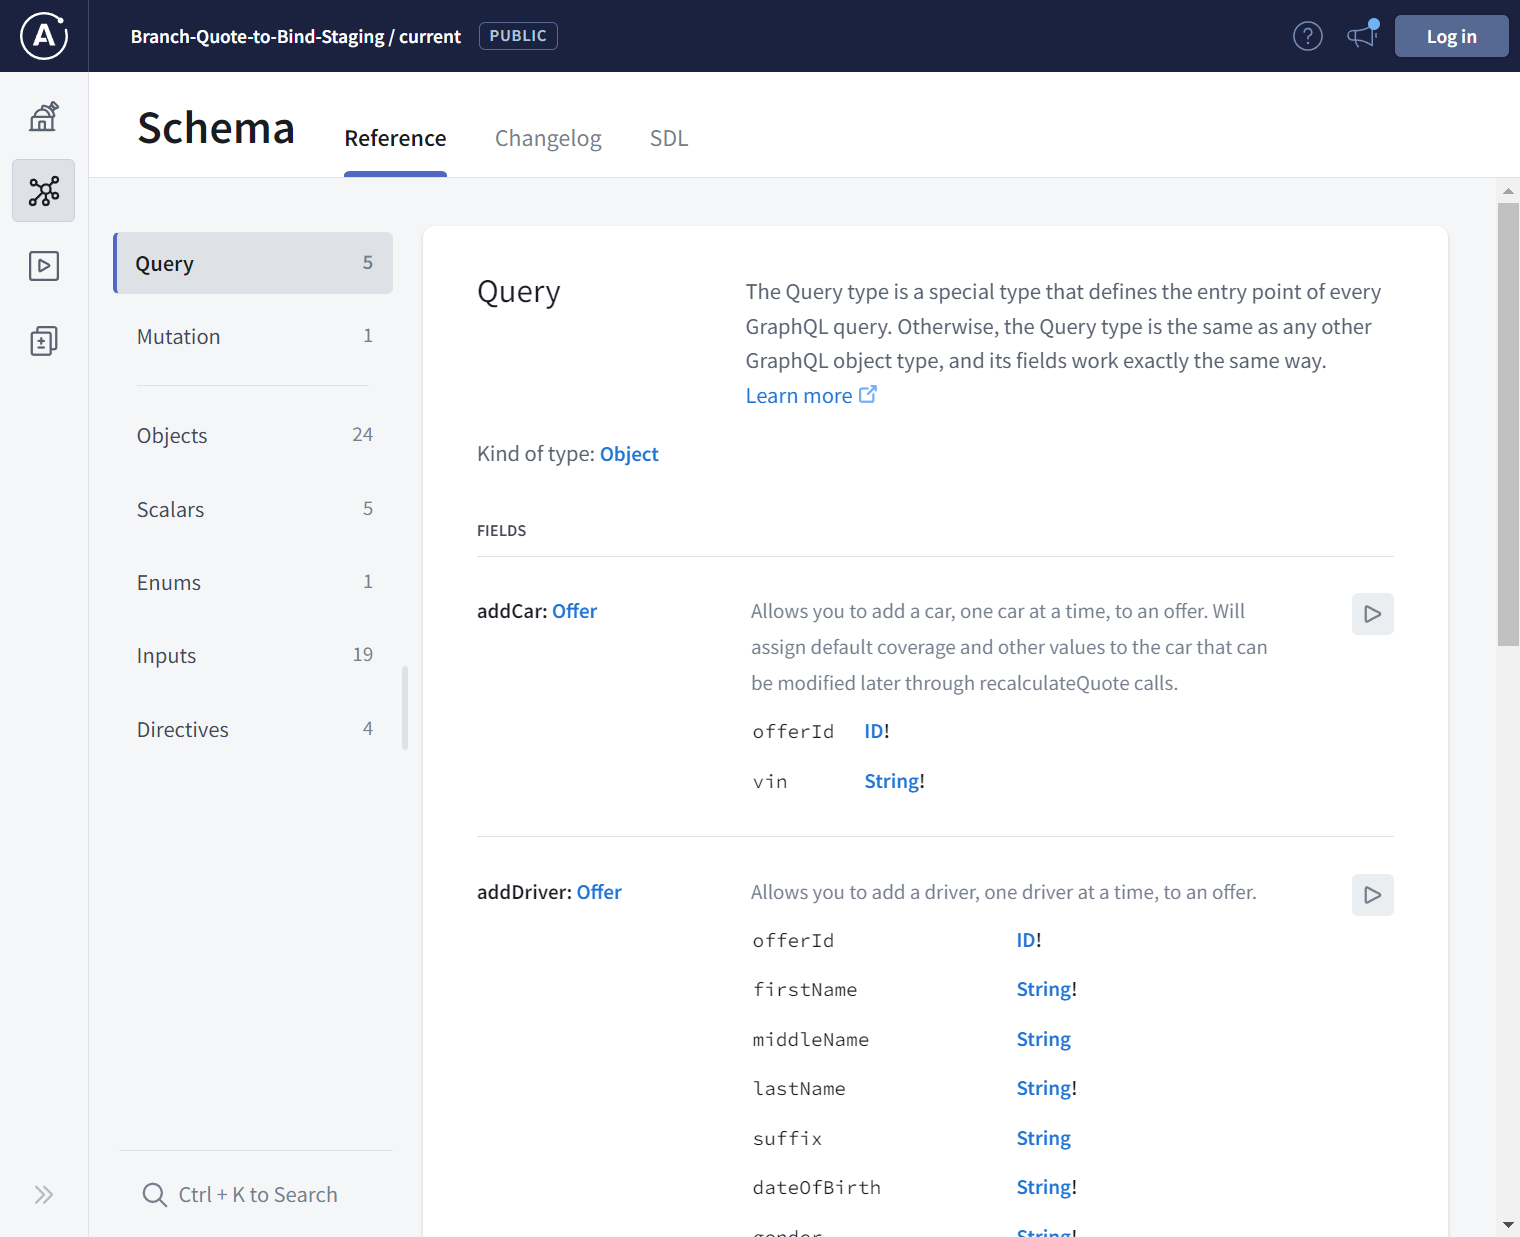
- You can browse through a list of all available queries, mutations, arguments, types and fields in the schema by going to the schema section on the playground sidebar (graph icon), or by clicking here. We've tried to document every operation and field thoroughly so please click through and read everything.
- You can also use the quick reference on the sidebar in the Explorer section of the playground to construct operations interactively:
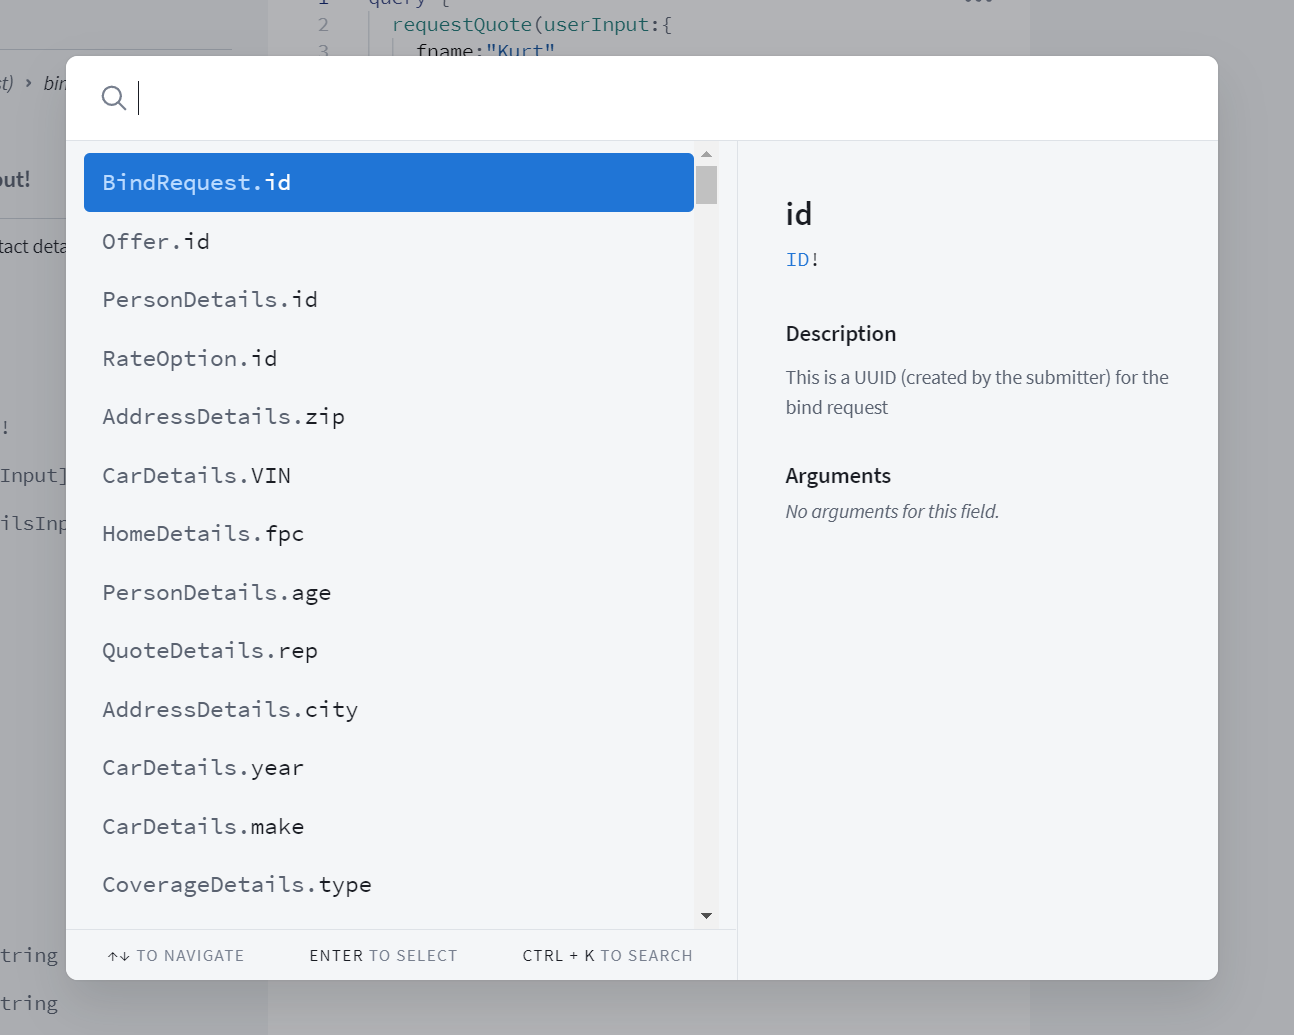
Search
- You can also search through the available fields, queries, and mutations (with their documentation) using the search button on the top left, or by hitting Ctrl + K (Cmd + K on macOS):
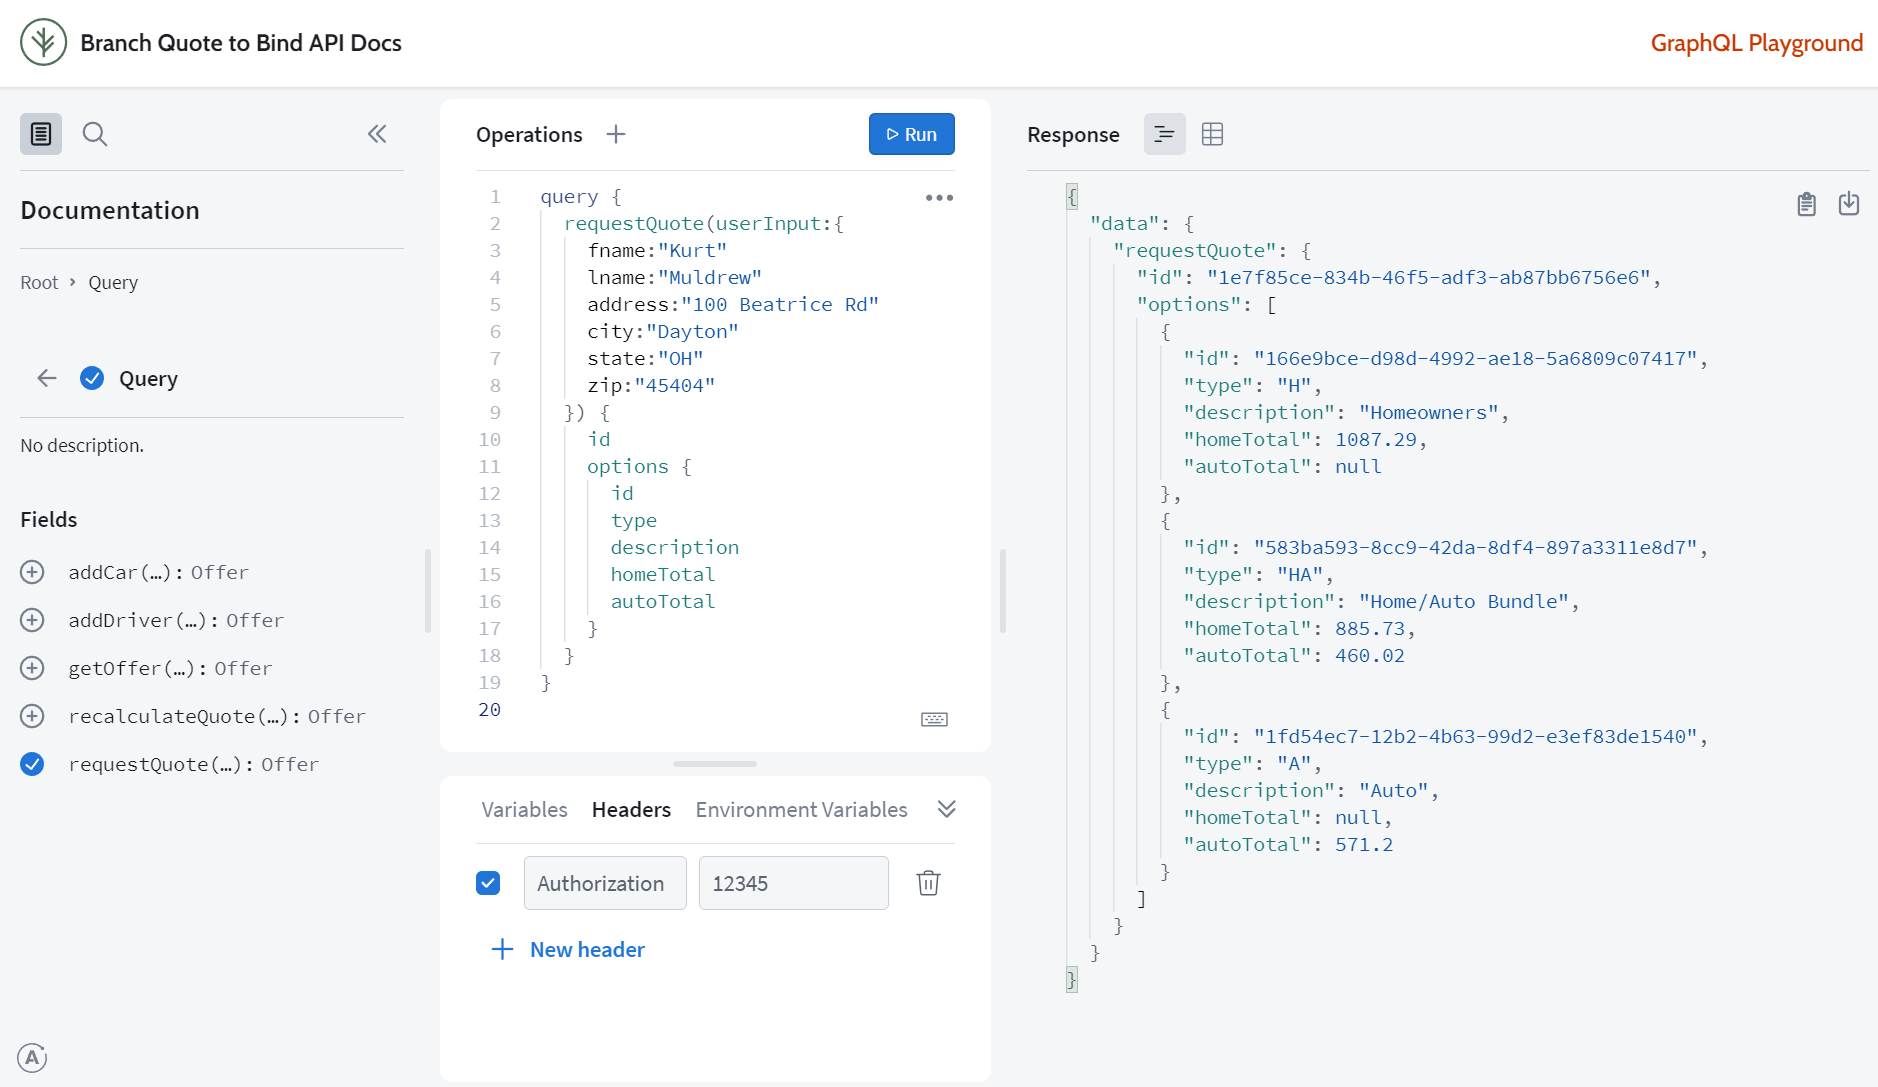
Making Requests
- You can make queries by building them in the "Operations" section and hitting "Run". The response will by default be displayed as JSON (which is how your client library will receive it as well):
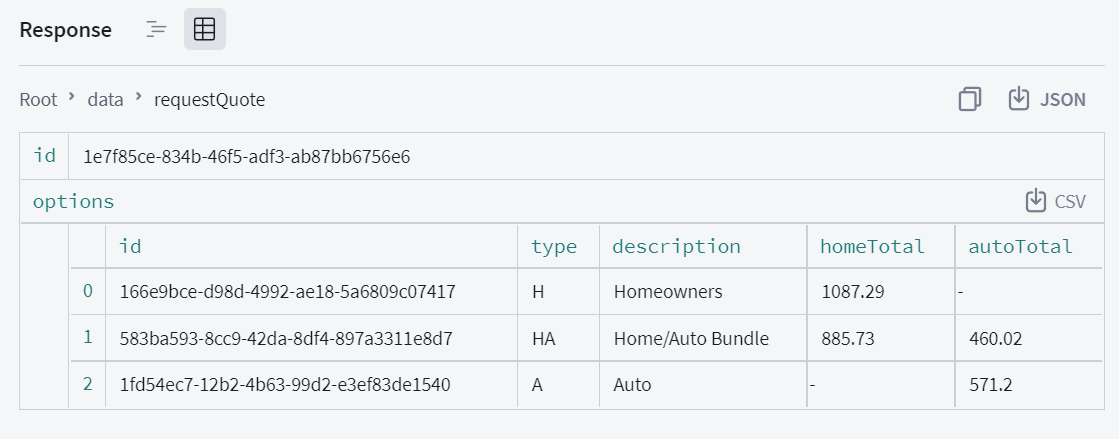
- You can also view the response as a table by clicking the table icon at the top of the "Response" section. This is helpful in the playground to understand what data you're getting back, but obviously cannot be used in your code with GraphQL client libraries:
Making Requests from Code
Make sure your code recognizes and handles timeouts appropriately.
Extracting Arguments into Variables
-
While you can copy the operation from the "Operations" section in the Playground for use in your code, you will want to use variables for the query arguments instead of putting values inline like in the playground.
-
This lets you define a query once in your code, and programmatically set the values of the arguments that you send in that query.
-
For example, here is the default query with the arguments extracted out as variables:
query RequestQuote(
  $fname: String!
  $lname: String!
  $address: String!
  $city: String!
  $state: String!
  $zip: String!
) {
  requestQuoteV2(userInput: { fname: $fname, lname: $lname, address: $address, city: $city, state: $state, zip: $zip }) {
    id
    options {
      id
      type
      description
      homeTotal
      autoTotal
    }
  }
}
- You can learn more about how to do this and how variables in GraphQL work here: https://graphql.org/learn/queries/#variables
JavaScript Example
- Here's an example of how you'd make the above
requestQuoteV2call from code in JavaScript, using thegraphql-requestclient library (https://github.com/prisma-labs/graphql-request):
const { GraphQLClient, gql } = require('graphql-request');

const graphQLClient = new GraphQLClient('https://staging.v2.api.ourbranch.com/', {
  headers: {
    Authorization: '<API key goes here>',
    'x-affinity-code': '<Affinity code goes here>' // Only applies to partners responsible for multiple affinity codes.
  }
});

const query = gql`
  query RequestQuote(
    $fname: String!
    $lname: String!
    $address: String!
    $city: String!
    $state: String!
    $zip: String!
  ) {
    requestQuoteV2(
      userInput: { fname: $fname, lname: $lname, address: $address, city: $city, state: $state, zip: $zip }
    ) {
      id
      options {
        id
        type
        description
        homeTotal
        autoTotal
      }
    }
  }
`;

const variables = {
  fname: 'Kurt',
  lname: 'Muldrew',
  address: '100 Beatrice Rd',
  city: 'Dayton',
  state: 'OH',
  zip: '45404'
};

graphQLClient.request(query, variables).then((data) => console.log(data));
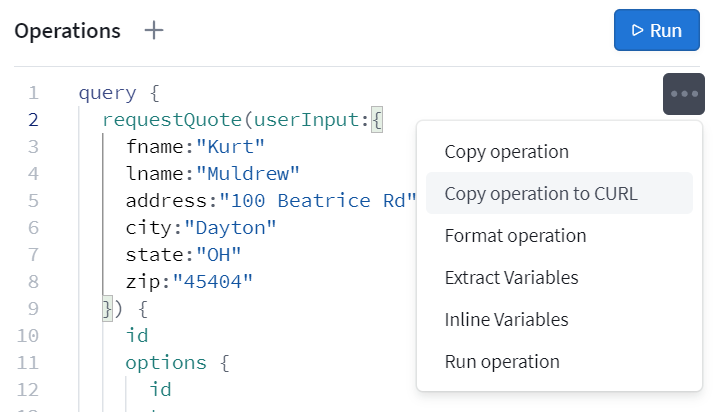
CURL Example
- When you're ready to start writing code, you can copy an operation as a CURL command from the Playground to see how it translates to an HTTP request. This can be a reference for how you can make these requests from your code if you're unable to find a suitable GraphQL client library for your needs.
- For example, the following query:
query RequestQuote(
  $fname: String!
  $lname: String!
  $address: String!
  $city: String!
  $state: String!
  $zip: String!
) {
  requestQuoteV2(userInput: { fname: $fname, lname: $lname, address: $address, city: $city, state: $state, zip: $zip }) {
    id
    options {
      id
      type
      description
      homeTotal
      autoTotal
    }
  }
}
... with these variables:
{
  "fname": "Kurt",
  "lname": "Muldrew-Clean",
  "address": "100 Beatrice Rd",
  "city": "Dayton",
  "state": "OH",
  "zip": "45404"
}
...would be this CURL command:
curl --request POST \
    --header 'Authorization: <API key goes here>' \
    --header 'x-affinity-code: <Affinity code goes here>' \ # Only applies to partners responsible for multiple affinity codes.
    --header 'content-type: application/json' \
    --url 'staging.v2.api.ourbranch.com' \
    --data '{"query":"query RequestQuote(\n  $fname: String!\n  $lname: String!\n  $address: String!\n  $city: String!\n  $state: String!\n  $zip: String!\n) {\n  requestQuoteV2(\n    userInput: {\n      fname: $fname\n      lname: $lname\n      address: $address\n      city: $city\n      state: $state\n      zip: $zip\n    }\n  ) {\n    id\n    options {\n      id\n      type\n      description\n      homeTotal\n      autoTotal\n    }\n  }\n}","variables":"{\r\n  \"fname\": \"Kurt\",\r\n  \"lname\": \"Muldrew\",\r\n  \"address\": \"100 Beatrice Rd\",\r\n  \"city\": \"Dayton\",\r\n  \"state\": \"OH\",\r\n  \"zip\": \"45404\"\r\n}\r\n"}'
Completing the Flow on Branch's Site
You do not need to complete the entire quote to bind process using the API. At any point during the process, you can hand the customer off to us to complete the process on our site. As long as the initial offer from requestQuoteV2 was generated by you, you will still receive attribution for the customer.
You do this by constructing URLs with the id field from the Offer object you receive when you call requestQuoteV2 or recalculateQuoteV2.
Also note that if the offer you send us has an older rate control date, we'll refresh it to reflect the rate today.
For the instructions that follow, use https://ourbranch.com/ as the base URL for production.
In the staging environment, use https://musa.ourbranch.dev/ as the base URL.
E.g:
- For production offers:
https://ourbranch.com/offer/9c80c749-20fc-4410-8f5e-5ae9872bf9c7?redirect=customize - For staging offers:
https://musa.ourbranch.dev/offer/9c80c749-20fc-4410-8f5e-5ae9872bf9c7?redirect=customize
1. Customize Step
Sending a user to this step lets them view the offer and customize their coverage. Keep in mind that if the user changes coverages, a new offer ID will be generated reflecting the changes, but it will still be attributed to you.
If you set a leadID while creating the offer, it will be persistent across all offer IDs created while customizing coverages of the offer. We can use this field in postbacks to you so you can uniquely identify a lead across a thread of offer IDs. See here for information on postback options.
To send a customer to the customize step on Branch's site, you must send them to https://ourbranch.com/offer/{offerId}?redirect=customize where offerId is the ID of the offer.
E.g: https://ourbranch.com/offer/9c80c749-20fc-4410-8f5e-5ae9872bf9c7?redirect=customize
The customize step looks like this:

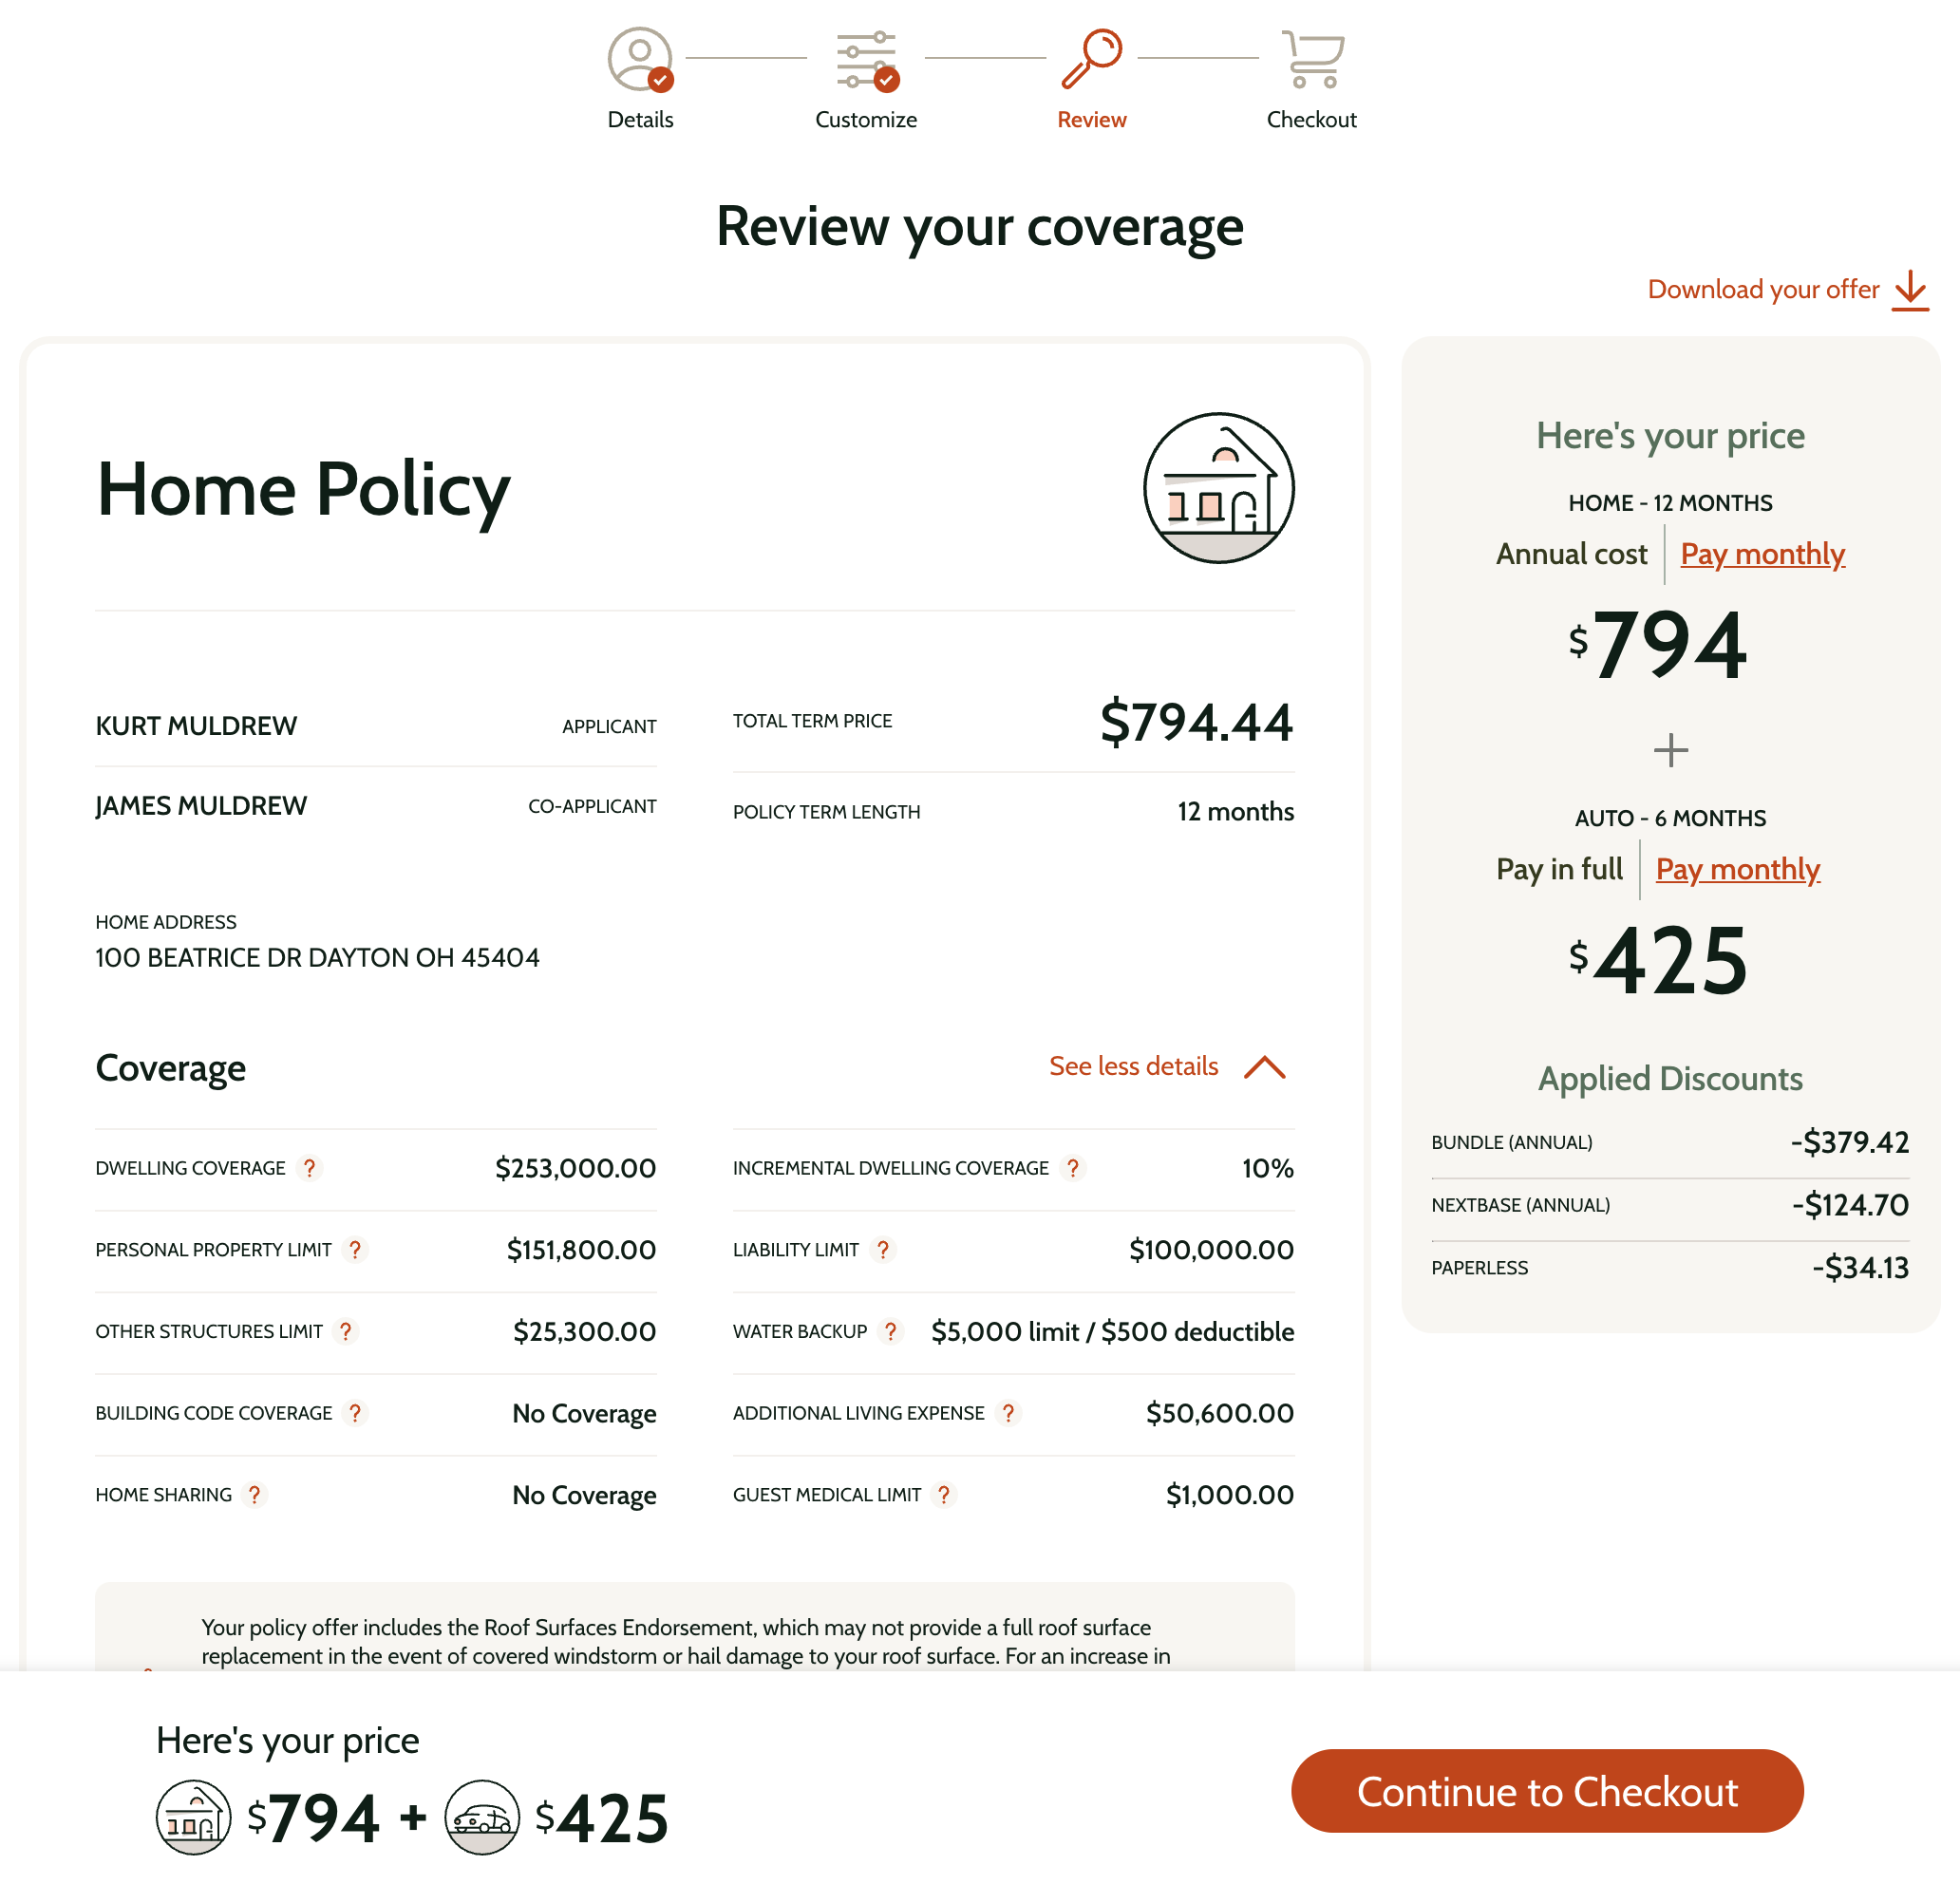
2. Review Step
The review step comes after the customize step, and lets the user view the offer's coverage information in detail, as well as download a PDF copy of the offer.
To send a customer to the review step, you must send them to https://ourbranch.com/offer/{offerId}?redirect=review where offerId is the ID of the offer.
E.g: https://ourbranch.com/offer/9c80c749-20fc-4410-8f5e-5ae9872bf9c7?redirect=review
The review step looks like this:
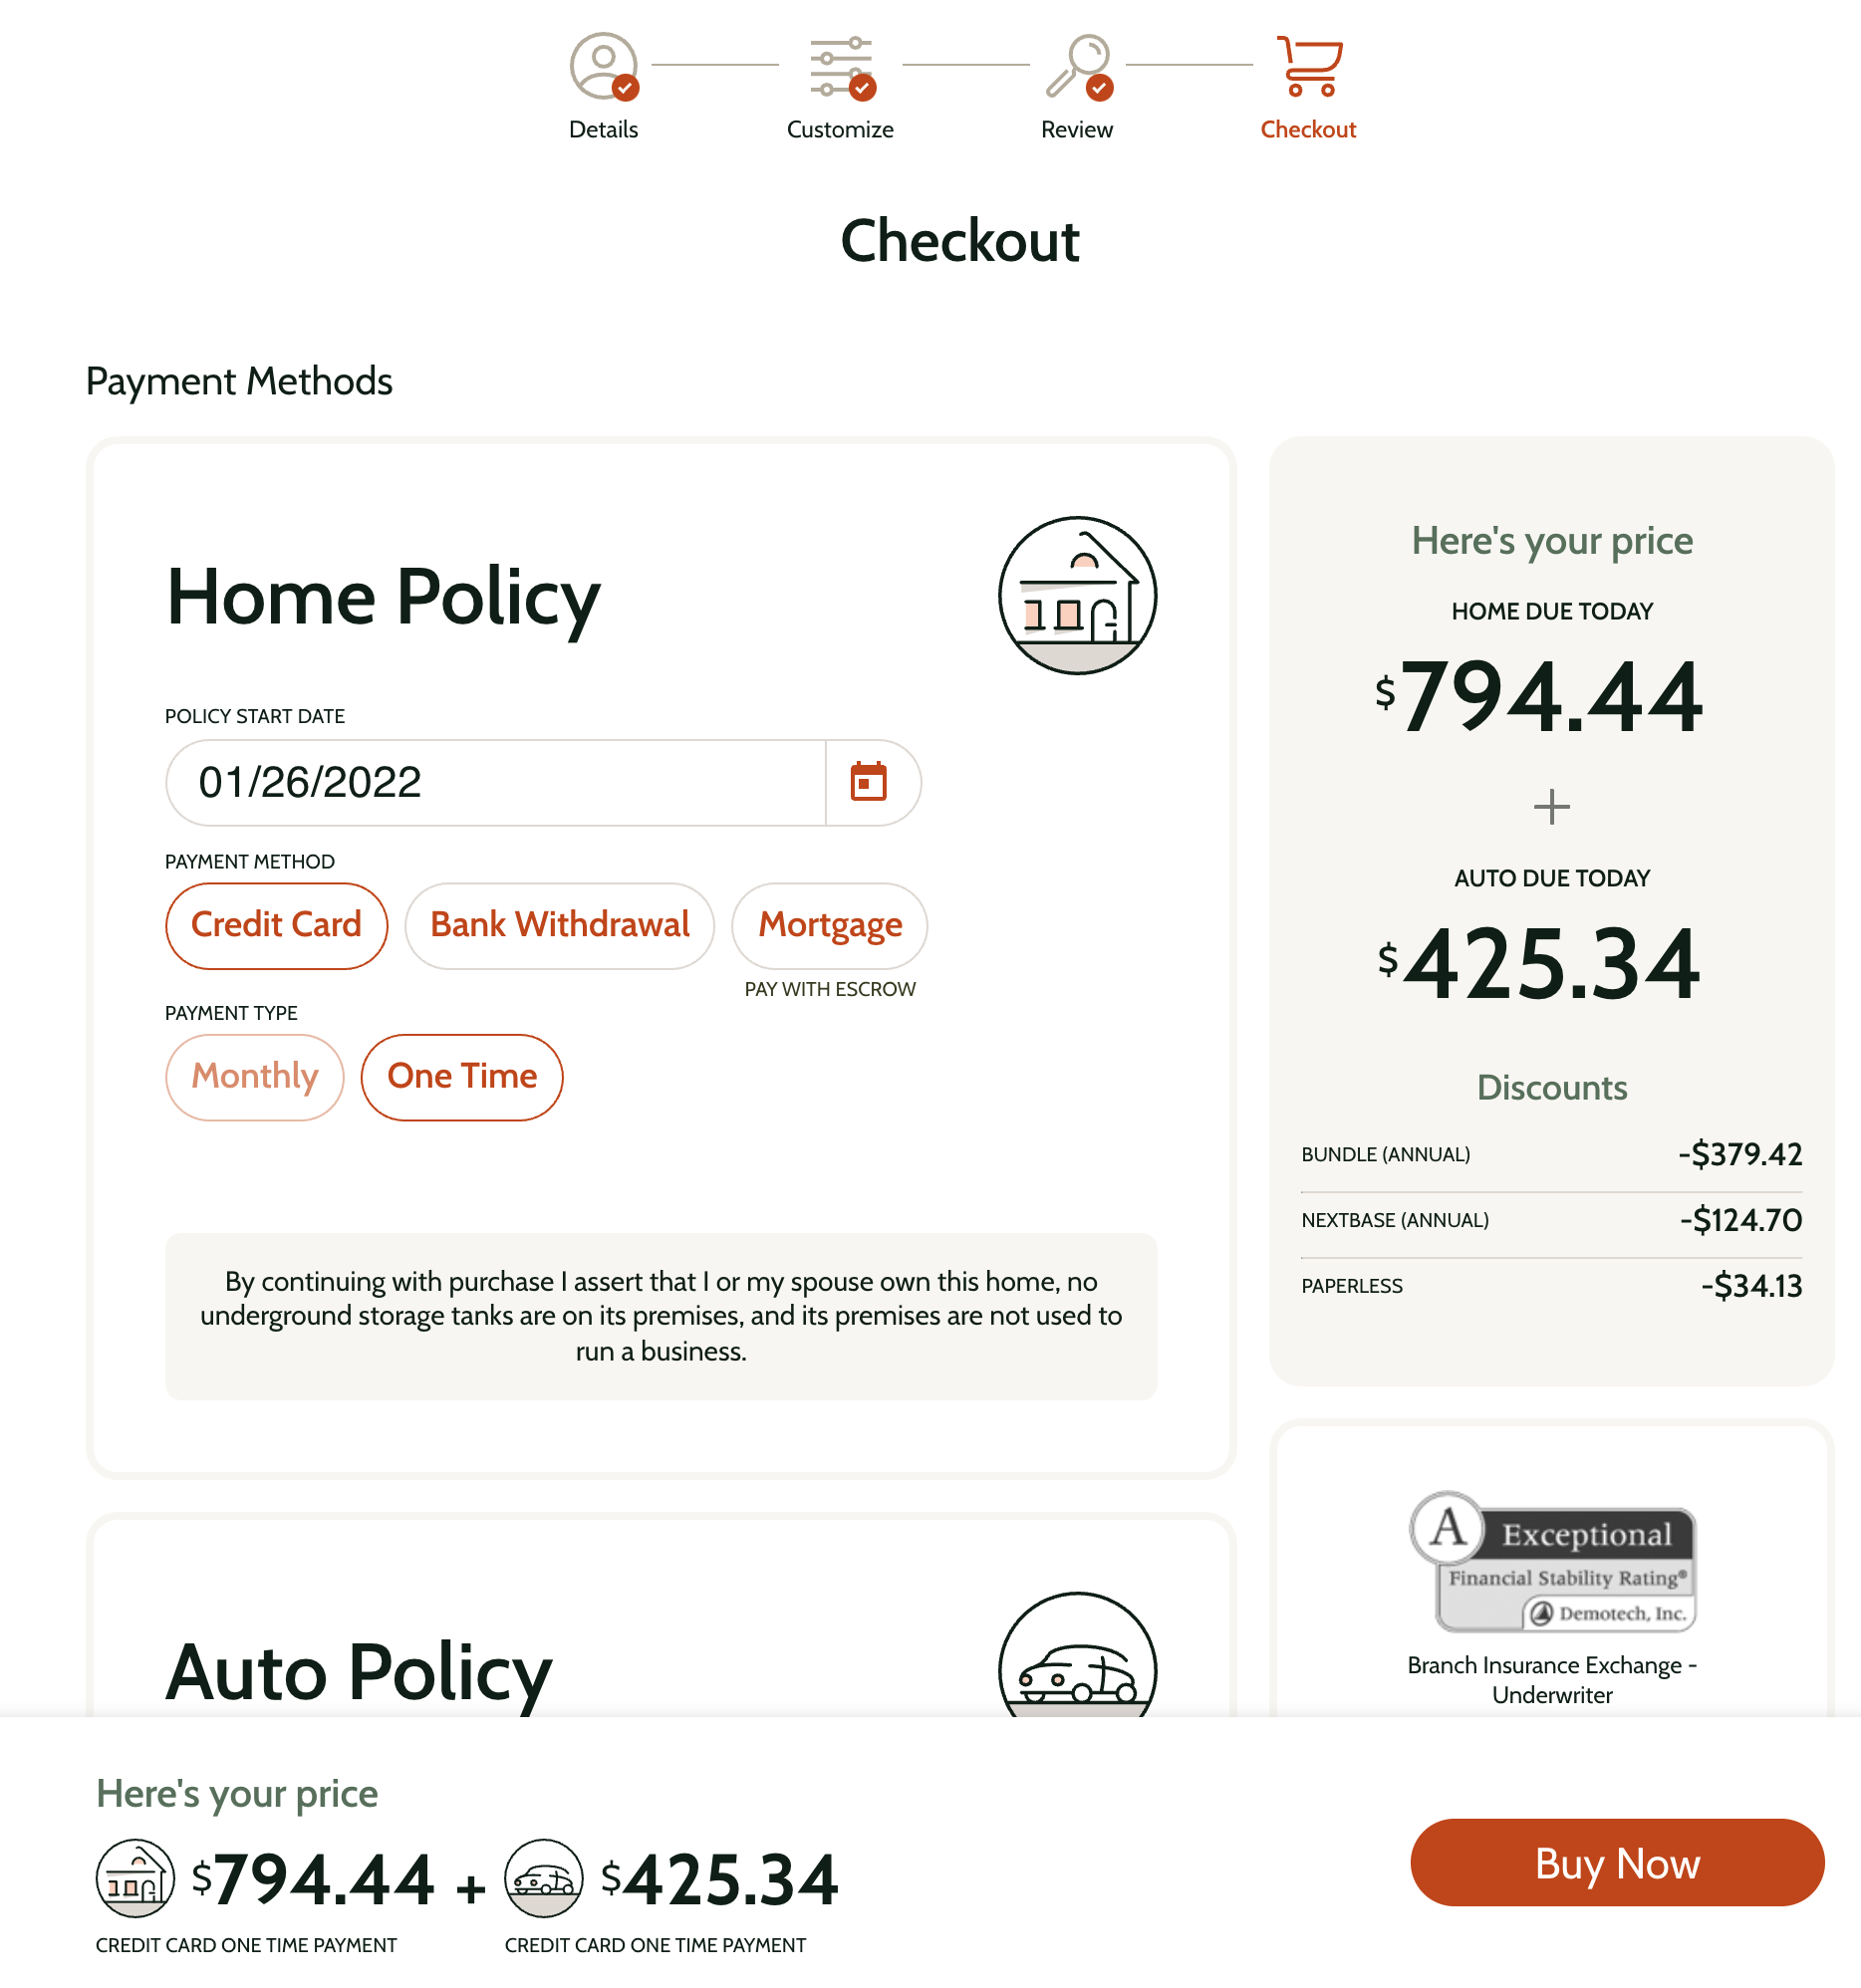
3. Checkout Step
The checkout step comes after the review step, and lets the user select how they want to pay for the policy, and complete the payment. This includes collecting the user's credit card information, or connecting to their bank if they choose to pay via bank withdrawal.
If you want to handle everything in your own application, but want to hand the final purchase and payment step to Branch, you'll want to send the user here.
To send a customer to the checkout step, you must send them to https://ourbranch.com/offer/{offerId}?redirect=checkout where offerId is the ID of the offer.
E.g: https://ourbranch.com/offer/9c80c749-20fc-4410-8f5e-5ae9872bf9c7?redirect=checkout
The checkout step looks like this:
Presenting a Specific Offer Type
By default the above URLs will present the home + auto bundle option to the user if a HA option is present in the offer (options array on the Offer type).
If you want to present a specific option to the user, you must include an additional policyType query parameter, whose value can be H, A, or HA (for home, auto, and home + auto bundle respectively).
For example https://ourbranch.com/offer/{offerId}?redirect=checkout?policyType=A will present the user with the auto option of the offer only.
Make sure that the option you're sending the user to exists on the offer before doing so. For example, do not send a user to https://ourbranch.com/offer/{offerId}?redirect=review&policyType=H if there was no home option on the offer.
You can find the type of an option by the offer.options[optionIndex].type field, documented here.
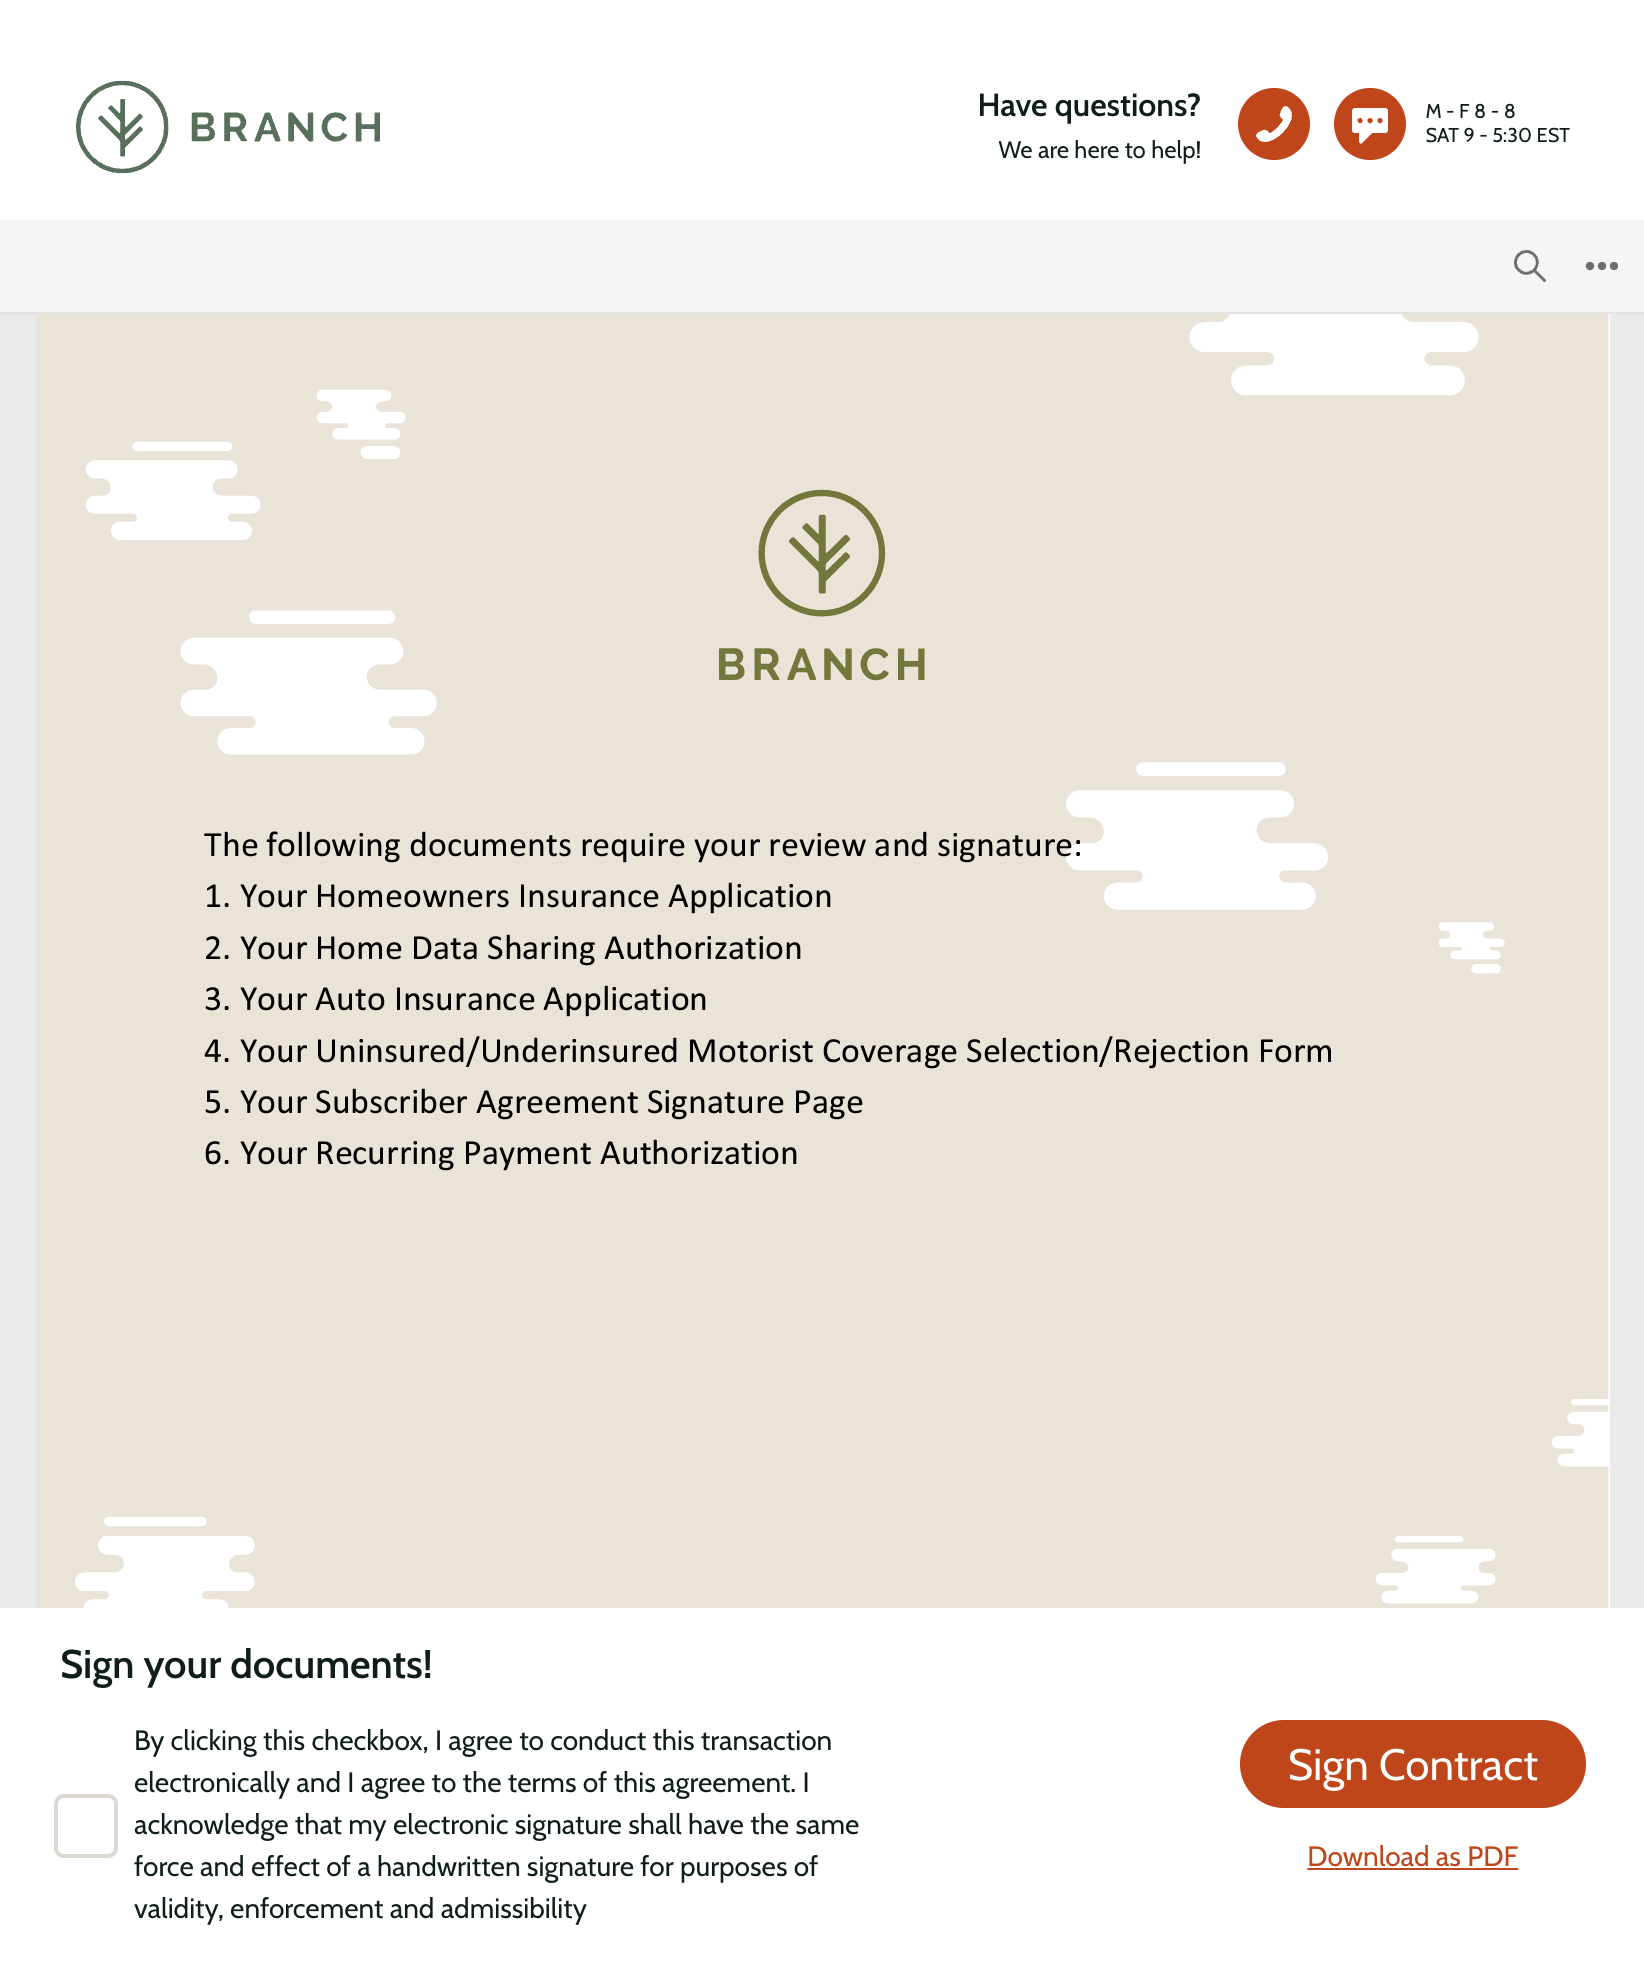
4. Sign Documents Step
The sign documents step happens post-bind, and lets the user view, download, and sign their policy documents.
If you are handling the policy bind in your own application via the API with requestBind, it is not required to bring the user to the sign documents page unless you want that to be part of your experience.
Branch will reach out to the user via email as well as display notices within the Branch account web app and mobile app to sign the policy documents.
Constructing this URL is different compared to the previous steps, as it needs to happen post-bind. You must use the id and systemId fields from the BindRequest response you receive when you call the requestBind mutation successfully.
The URL looks like: https://ourbranch.com/purchased?id={id}&sid={systemId}
Note: The id and systemId fields represent the id and systemId returned by the requestBind mutation. The id does not refer to the offer ID.
The sign documents step looks like this:
Opening the Offer on Branch's Staff App
You can open any offer directly in Branch's internal staff application using the offer ID.
For the instructions that follow, use https://staff.ourbranch.com/ as the base URL for production.
In the staging environment, use https://staff-musa.app.ourbranch.dev/ as the base URL.
E.g:
- For production offers:
https://staff.ourbranch.com/offer/9c80c749-20fc-4410-8f5e-5ae9872bf9c7 - For staging offers:
https://staff-musa.app.ourbranch.dev/offer/9c80c749-20fc-4410-8f5e-5ae9872bf9c7
To open an offer on the staff app, navigate to https://staff.ourbranch.com/offer/{offerId} where offerId is the ID of the offer (the id field from the Offer object).
Policy Bound / Documents Signed Notifications and Reporting
Branch can notify you via webhook (instant) or via regularly scheduled reporting (daily / weekly CSV sent to an SFTP host or S3 bucket) when a policy is bound or when policy documents are signed by a customer.
We set up these notifications and reporting on a per-partner basis. If this is something you're interested in, reach out to us at api@ourbranch.com and we can talk about setting up something that works for your use case.
Getting Policy Information After Bind
If you need to get policy information after an offer has been bound, the getBoundPoliciesByOfferId query allows you to supply an offer ID and get the policies that were bound with that offer ID.
This also includes the customer-facing URL for signing the application that you can present to the customer on your end if you want to do so. This URL takes the customer to the UI described in the Sign Documents Step here.
Policies are bound asynchronously so this query may return an empty array if the policies have not been generated yet.
If you're looking for information on the policy just after you've bound an offer, our recommendation is to poll the getBoundPoliciesByOfferId query in 10 second intervals after bind until the policies are generated, at which point they'll be returned by the query.
Getting Policy Documents
If you need to get policy documents for a customer after they've bound, the getPolicyDocuments query allows you to supply a policy ID and get links to download policy documents associated with that policy ID.
You will need to get the policy ID from the getBoundPoliciesByOfferId query described above.
There are some caveats with this query that you should be aware of before you use it:
- The URLs to the policy documents in the response are only valid for 15 minutes after the response. Once they've expired, you'll need to make another call to
getPolicyDocumentsto get new URLs. - Policy documents are generated asynchronously so this query may return an empty array if the documents are not yet available.
- The signed application is only returned after the customer has signed the application. Until then the signed application will not be present in the list. Keep in mind that on rare occasions the customer may not sign the application for several days post-bind.
Our recommendations is to poll the getBoundPoliciesByOfferId query in 10 second intervals as described above, and once the getBoundPoliciesByOfferId query returns a non-empty response with policy information, start to poll the getPolicyDocuments query in 10 second intervals until documents are generated and available, at which point they will be returned by the getPolicyDocuments query.
If you need to get signed documents, reach out to us at api@ourbranch.com about getting a webhook set up for document signed notifications. When the customer signs their documents, we'll make an HTTP request to your webhook to notify you. Once you receive the document signed notification, we recommend you poll getPolicyDocuments in 10 second intervals until the signed application document is returned in the response.
Getting an Offer PDF
If you need to get a customer-facing PDF with details of an offer, the getOfferPDF query allows you to supply an offer ID and an option type (e.g., "A", "H", "HA") and get a link to download an offer PDF. Note that you must download the offer PDF within 15 minutes; after that, the link will expire.
Enhanced Data Calls
The schema contains types and calls prefixed with "enhanced" (such as enhancedGetOffer which returns an EnhancedOffer type). We call these enhanced data calls and they provide additional data in their responses (such as date of birth for drivers) that is not available to all partners.
If you try to make one of these calls and you don't have enhanced data access, you'll receive an error.